Weekly Hands-on How-To powered by KnowHow
How to Perform Lead Water Mitigation Technician Duties

Team lead, crew chief, lead technician—no matter what title they go by, it’s easy to identify this key player on the job site. They’re the ones always on the move, fielding questions, talking to homeowners, and juggling a constantly buzzing phone. You might watch from afar and wonder, "What exactly does this person do?” The quick answer, and the one they'd give you in between all of their phone calls, is "a lot."
So, case closed, right? Well, not quite. We’re here to expand on that answer and provide some specifics, focusing on the exact responsibilities of a Lead Water Mitigation Technician. If you happen to be training for this role, this is exactly where you need to be.
In this weekly how-to, powered by KnowHow, we’ll discuss a Lead Technician's essential duties and responsibilities. From being the main point of contact on-site to training your team and documenting every detail, we’ll provide a comprehensive look at what it takes to excel in this pivotal role.
Note: This Weekly Hands-On How-To was based on this template in KnowHow’s template library.
So, What Does a Water Mitigation Lead Technician Do?
In simple terms, when flooding or leaks turn a home into a chaotic mess, the lead technician is the anchor in the storm. But the role involves much more than just overseeing the cleanup. The Lead Water Mitigation Technician is the cornerstone of the operation, providing clear direction, support, and expertise to both the mitigation team and the homeowners. They coordinate the entire mitigation process to guarantee that every step is executed efficiently and effectively.
Here are The Basic Roles and Responsibilities
Note: These roles and responsibilities are in no particular order but are all essential to the effective performance of a Water Mitigation Lead Technician
Step 1: Be the Main Point of Contact on the Site
As the Water Mitigation Lead Technician, you're the central figure at the site. You’re responsible for coordinating all activities and ensuring everything runs smoothly. This means:
- Coordinating Activities: You're in charge of managing all water mitigation tasks, making sure everything stays on track and meets quality standards.
- Client Communication: Act as the bridge between the client and your team, keeping the homeowner updated and handling any issues that pop up.
- Team Management: Lead your crew with confidence, providing guidance and support as needed.
Essentially, you're the one everyone turns to for updates and info, making sure the homeowner feels supported and in the loop throughout the project.
Step 2: Walk the Homeowner Through the Process
Taking the time to walk the homeowner through the water mitigation scope is very important to ensure their comfortability with the process, and with your team. You need to explain the extent of the water damage and the necessary steps to mitigate it. This involves:
- Explaining the Damage: Describe what’s happened and what needs to be done in terms the homeowner can understand.
- Overview of Tools and Techniques: Show them the equipment and methods you’ll use to restore their property.
- Answering Questions: Be ready to address any concerns they might have.
Make sure the homeowner understands the process and the importance of prompt action to prevent further damage.
Step 3: Use Moisture Meters
Once you've established yourself as the main point of contact on-site and have walked through the process with the homeowner, it’s time to start using your Moisture meters. They help you measure the moisture content of various materials affected by water damage. By using these meters, you can accurately assess the extent of the damage and decide on the best course of action. Here’s how you use them:
- Measure Moisture Content: Use the meters to check different areas like walls, floors, and ceilings.
- Plan Mitigation Actions: Based on the readings, determine what needs to be done to address the damage.
- Document Readings: Keep a systematic record of all readings for future reference and documentation.
Step 4: Document Everything
Keeping detailed records is a massive part of your job. Without records, photos and data, the claims process of the loss, as well as your business will be at risk. As the Lead Technician, you need to thoroughly document the progress of the water mitigation project. This includes:
- Taking Clear Photos: Capture images of the affected areas to show the extent of the damage.
- Recording Moisture Readings: Use your moisture meters to document the levels of moisture in different areas.
- Tracking Progress: Keep detailed notes on the tasks completed, equipment used, and any challenges encountered.
These records are invaluable for insurance claims and future reference.
Step 5: Spot Potential Hazards
Safety is paramount in any water mitigation project. As the Lead Technician, you are accountable for safety on site and must inspect the environment thoroughly to identify any potential hazards. This includes looking out for:
- Electrical Hazards: Ensure that there are no electrical dangers present.
- Structural Instability: Check for any signs of structural weakness that could pose a risk.
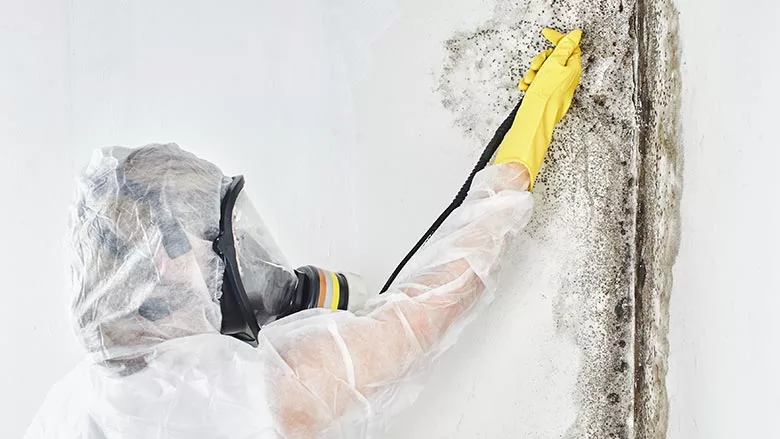
- Mold and Harmful Substances: Identify any presence of mold or other hazardous materials.
Document any findings and take necessary precautions to ensure a safe working environment.
Step 6: Note Pre-Existing Damages
Before starting the mitigation work, it’s important to identify and document any pre-existing damages. This helps to ensure that you have a clear understanding of the site's condition before beginning your work. Steps include:
- Inspect Thoroughly: Look for any existing issues that need to be noted.
- Document Everything: Take detailed photographs and notes, recording the location, extent, and nature of each issue.
Step 7: Train Your Team
As the Lead Technician, you are also responsible for training technicians. Effective training is essential to ensure that your team can perform their duties safely and efficiently. This involves:
- Providing Guidance: Show and explain the proper techniques and procedures for water mitigation.
- Teaching Safety Protocols: Ensure your team understands and follows all safety guidelines.
- Monitoring and Feedback: Keep an eye on their progress and provide constructive feedback to help them improve.
By training your team well, you ensure that the project can be completed efficiently and effectively.
Conclusion
Becoming a Lead Water Mitigation Technician means stepping up as the cornerstone of your team's success. It's about more than just checking boxes—it's about leading with confidence, transforming chaos into order, and ensuring every project runs smoothly. It’s quite the challenge.
Luckily, KnowHow makes this challenge much easier. By providing your team with KnowHow's mobile and desktop app, they get all the comprehensive training, on-the-job support, and detailed SOPs they need to handle tasks independently.
This means fewer phone calls, less time spent answering questions, and more focus on the big picture. Your team can confidently navigate any situation, reducing the pressure on you and consistently delivering high-quality results. Visit tryknowhow.com to discover how we can support your success in the field.
Looking for a reprint of this article?
From high-res PDFs to custom plaques, order your copy today!
