Weekly Hands-on How-To powered by KnowHow
How To Identify Worksite Hazards

It’s all too easy to jump straight into action as soon as you arrive on a job site. After all, as restorers, your mission is to restore—it's in your DNA! But would you run across a minefield without a second thought? Of course not. But ignoring even the tiniest safety hazards, like a frayed extension cord, can quickly place you in similar danger.
A safe, secure work environment means fewer distractions and more focus on getting the job done right. So, in this weekly how-to, powered by KnowHow, we’ll break down the steps to spot and identify the most common workplace hazards. With these strategies, you'll be better equipped to create a better, more efficient job site for everyone involved.
So, buckle up (safety first!), and let’s get started.
Step 1: Review OSHA's Hazard Identification and Assessment Protocol
Before diving into your hazard identification process, make sure you're up-to-date with OSHA's hazard identification and assessment protocols. Familiarizing yourself with these guidelines ensures you're following legal requirements and best practices for hazard identification.
For detailed information, visit OSHA's official site.
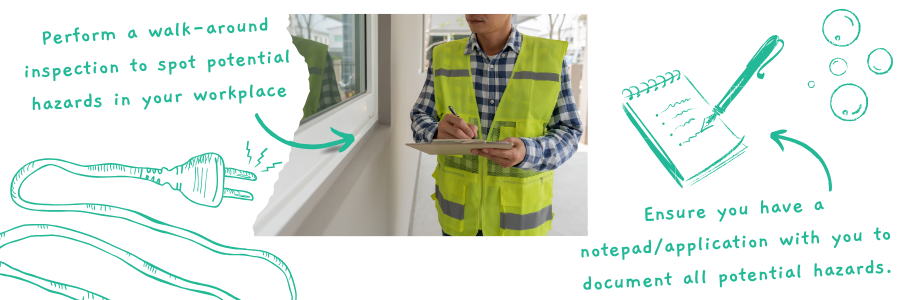
Step 2: Perform a Walk-Around Inspection and Consider All Common Workplace Hazards
Take a comprehensive walk-around inspection to spot potential hazards in your workplace. Here are some common hazards to keep an eye out for:
- Working at Height: Look for ladders, forklifts, and scaffolding. Identify where fall protection is needed.
- Poor Housekeeping: Check for materials blocking fire exits, overstacked loads, blocked sprinkler heads, leaks, standing water, or anything that might cause slips, trips, or falls.
- Electrical Extension Cords: Ensure cords are in good condition, not frayed or cut, and not near water. Avoid daisy-chaining cords and mitigate any tripping hazards.
- Forklifts and Machinery: Follow manufacturer instructions or safety data sheets to confirm everything is up to current specifications. Consider long-term health hazards such as high noise levels.
- Chemicals: Review safety data sheets for all chemicals. Maintain an inventory and track expiration dates to prevent chemicals from degrading into volatile compounds.
- Confined Spaces: Verify proper permits and assess the atmosphere in each confined space. Ensure employees understand what constitutes a confined space.
Step 3: Consider Non-Routine Operations
Non-routine operations like maintenance, cleaning, or changes in production cycles can introduce unique hazards. Here are some specific scenarios to consider:
- Maintenance Work: What happens when machinery needs servicing? Are there specific hazards associated with disassembly or repair?
- Cleaning Operations: Could there be exposure to hazardous chemicals? Are there slip hazards from wet floors?
- Production Changes: How do shifts or changes in production cycles affect safety? Are there new risks introduced by different machinery or processes?
- Emergency Situations: Can you locate the breaker box in the dark? What if you need to shut off the water supply quickly?
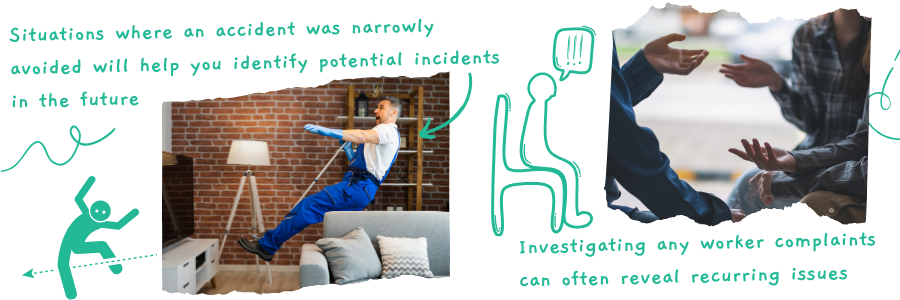
Step 4: Review Near Misses or Worker Complaints
Near misses, or situations where an accident was narrowly avoided, are invaluable in highlighting potential dangers that might not be immediately apparent. Similarly, worker complaints often reveal recurring issues that need addressing.
Here’s how to effectively review and learn from these situations:
- Understand Near Misses: Collect and analyze reports of incidents that almost led to injury or damage. These near misses can shine a light on overlooked hazards and give you a better understanding of where to focus your safety efforts.
- Review Worker Complaints: Listen to your team's concerns. Regularly review complaints as they can point out persistent problems that may not be visible to management.
- Identify Patterns: Look for trends in the near misses and complaints. By identifying patterns, you can spot systemic issues that might otherwise go unnoticed.
Maintain a detailed record of all near misses and complaints. Review this data regularly to monitor the effectiveness of your safety interventions and ensure continuous improvement in your safety protocols.
Step 5: Practical Tips for Improving Job Site Safety
Now that you’ve identified potential hazards and reviewed near misses, it’s time to take action. Implement these top three tips to keep your job site safe and your team protected:
- Don't Forget Your Daily Standups: Always hold brief, daily safety meetings before beginning work to remind workers of potential hazards on-site and discuss any new issues that have arisen.
- A Tidy Site is a Safe Site: Encourage good housekeeping practices to prevent accidents caused by equipment clutter, spills, or poorly stored materials. A tidy site reduces the risk of trips, falls, and other injuries.
- Safety is Everyone's Job: Lead by example and prioritize safety in all aspects of your work. Encourage a culture where safety is everyone's responsibility and where team members look out for one another.
By integrating these practical tips into your daily operations, you can significantly enhance job site safety and ensure a healthier, more productive work environment for your team.
Build Your Foundation
Safety is the foundation of every successful project. In this template, we've highlighted the most common job site hazards and how to identify them. Even as veteran restorers, keeping track of all these risks and new OSHA standards can feel like an uphill battle.
If you're walking up that hill, KnowHow can help carry the load. With KnowHow’s desktop and mobile platform, your team has instant on-the-job guidance, based on your company’s SOPs and guidelines, without having to call head office. This means you can find answers on the fly and handle any situation with confidence.
Visit tryknowhow.com to discover how KnowHow can help you create a safer, smoother job site every time.
Looking for a reprint of this article?
From high-res PDFs to custom plaques, order your copy today!


