Weekly Hands-on How-To powered by KnowHow
How To Safely remove Mold-Infested Materials

Mold can be a master of disguise. It hides behind walls, under carpets, and in every nook and cranny it can find. In the battle against this silent invader, every restorer must be equipped with the right tools and a meticulous strategy to uncover, treat, and prevent mold effectively.
Welcome to another Mold May article, powered by KnowHow, where we delve deep into the practical steps of mold remediation. Whether you’re new to the field of restoration or a seasoned expert, this guide is designed to reinforce your techniques and expand your arsenal against mold damage.
Today's guide stems from a KnowHow template that is so comprehensive we couldn’t pack every detail into one article. For a deeper dive into this process, head to this KnowHow template to get the full scoop.
Ready to restore a healthier environment? We’ve got a big one today—so let’s jump right in.
Note: This Weekly Hands-On How-To was based on this template in KnowHow’s template library.
Step 1: Follow the Provided Mold Protocol
Kick off your mold removal journey by getting familiar with the protocol provided. This document contains all the essential guidelines to ensure you understand the scope and safety precautions of the protocol, which will guide your entire removal process.
Gather Necessary Tools and PPE:
- Tools: Assemble all specialized tools mentioned in the protocol.
- PPE: Prepare personal protective equipment such as gloves, goggles, and respirators.
Review Techniques: Go through the protocol carefully to grasp the recommended techniques for identifying and removing mold. This includes guidance on assessing mold growth, identifying its source, and selecting the appropriate removal methods.
Step 2: Find and Fix the Source of the Mold Damage
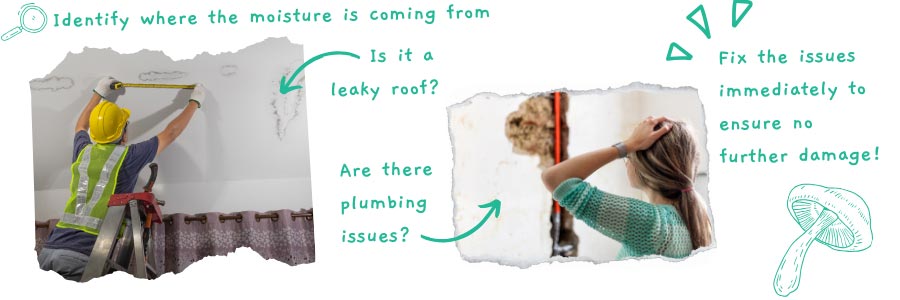
Start by identifying where the moisture is coming from. Is it a leaky roof or perhaps plumbing issues? Repair these sources of moisture promptly to prevent mold from coming back.
- Inspect for Leaks: Check for any signs of water damage or leaks that could contribute to mold growth.
- Make Repairs: Fix the issues immediately, whether it's sealing a leaky pipe or replacing damaged roof tiles, to ensure no further moisture can enter.
Step 3: Pull Back a Section of Carpet to Look at the Padding and Material Underneath, Assessing for Mold Growth
To check under carpets for mold, you need to be thorough and careful:
- Expose the Area: Gently pull back the carpet to reveal the padding and subfloor.
- Look for Signs of Mold: Check for any discoloration, dampness, or musty odors.
- Document Any Mold: Note the extent and locations of mold presence for targeted removal.
Step 4: Inspect the Wall Cavity to Look for Mold Growth by Using a Three-Sided Hole Cut
Investigating the wall cavity for hidden mold is a crucial step. Use a three-sided hole cut to access the inside of the wall. This allows for a direct visual inspection:
- Carefully Cut the Wall: Ensure the cut is clean and safe to facilitate easy repair later.
- Examine Thoroughly: Look for any signs of mold growth, such as discoloration or a musty smell.
- Document Findings: Record the extent of the mold and its locations for effective remediation.
Step 5: Put up a Containment to Protect the Occupants of the Home from Mold Cross Contamination
During the remediation process, creating an effective containment zone is essential to prevent mold spores from spreading to other parts of the home.
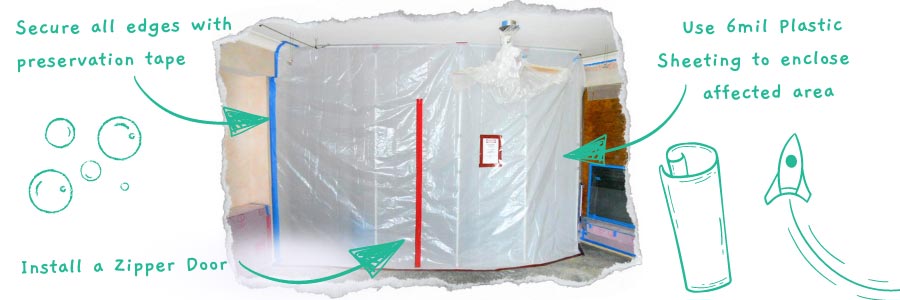
- Seal the Area: Use 6mil plastic sheeting to enclose the affected area completely.
- Secure All Edges: Use preservation tape on all seams and edges to ensure airtight containment.
- Install a Zipper Door: For entry and exit without compromising the containment integrity.
Step 6: Set up Your Negative Air Machine with the Ducting Going Outside
Proper setup of a negative air machine ensures that contaminated air is filtered out and not circulated back into the home.
- Position the Machine: Place it in a central location within the containment for optimal effectiveness.
- Secure Ducting: Attach and seal the ducting from the machine to an outside exit to ensure all mold spores are expelled from the environment.

Step 7: Don Proper Full Protective Equipment (PPE)
In Step 1, you prepared your personal protective equipment as outlined by your protocol. Now, it’s time to gear up with the appropriate PPE, including gloves, goggles, respirators, and protective clothing. This will protect you from inhaling or coming into direct contact with harmful mold spores.
For a detailed guide on Donning and Doffing PPE, refer to this KnowHow template.
Step 8: Clear and Secure the Affected Area
Before beginning the mold remediation process, managing and securing items and materials within the affected area is crucial to prevent contamination and facilitate effective cleaning.
- Remove Items: Carefully clear all items from the area. Move them slowly to avoid agitating and spreading mold spores. Clean these items with appropriate solutions as outlined in your protocol before storing them safely away from the contamination zone.
- Bag and Seal Mold-Affected Materials: Identify materials that cannot be cleaned or are too heavily affected by mold and place them into sturdy bags. Seal these bags tightly to ensure mold spores are contained and cannot escape.
- Safe Disposal: Remove these sealed bags from the containment area and dispose of them according to local environmental and health regulations to ensure safe and proper handling of mold-contaminated waste.
Step 9: Hepa-Vacuum the Entire Area, Including Concrete, Wall Cavities, and Anywhere Dust Could Have Settled During the Removal of Materials
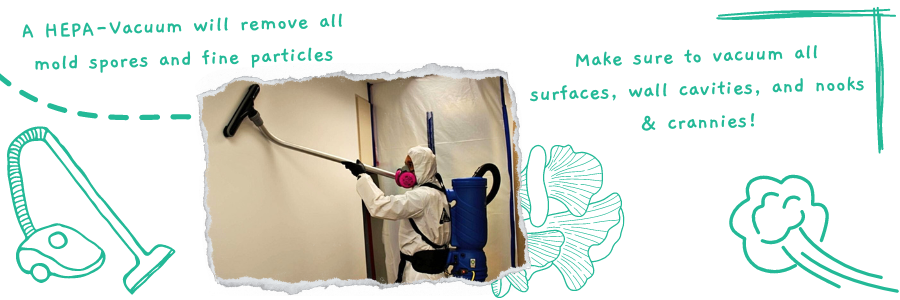
After removing all visible mold and contaminated materials, it’s time to start removing the mold spores. Begin by thoroughly cleaning the area with a HEPA vacuum.
This type of vacuum is essential because it can capture very fine particles, including mold spores, ensuring they're completely removed from your environment. Make sure to vacuum all surfaces, including concrete, inside wall cavities, and any other areas where dust might have settled during the cleanup process.
Step 10: Clean Wood Framing with a Mild Detergent Using a Wire Brush or Cloth, Scrubbing Until It Appears Visibly Clean
Next, focus on the wood framing that might have been exposed to mold. Scrub these surfaces with a mild detergent using a wire brush or a cloth. This helps remove any remaining mold spores or residues. If there's significant damage or deep-seated mold, you might need to sand the wood down to ensure all mold is eradicated.
Step 11: Damp Wipe All Areas Within the Mold Containment
Once the HEPA vacuuming is complete, take a damp cloth and thoroughly wipe down all surfaces within the containment area. This step helps pick up any residual dust or spores left behind by the vacuum.
Step 12: Dry Out the Wall Cavities and Other Affected Areas Using a Dehumidifier
Moisture control is vital in preventing mold recurrence. Use a dehumidifier to dry out damp areas, especially wall cavities where moisture can accumulate unseen. Leave the dehumidifier running long enough to ensure the areas are completely dry.
Step 13: Perform a Second Pass with the Hepa-Vacuum
After drying, perform a second round of HEPA vacuuming. This double-checks that no mold or dust remains, providing an additional layer of cleaning that helps prevent future mold growth.
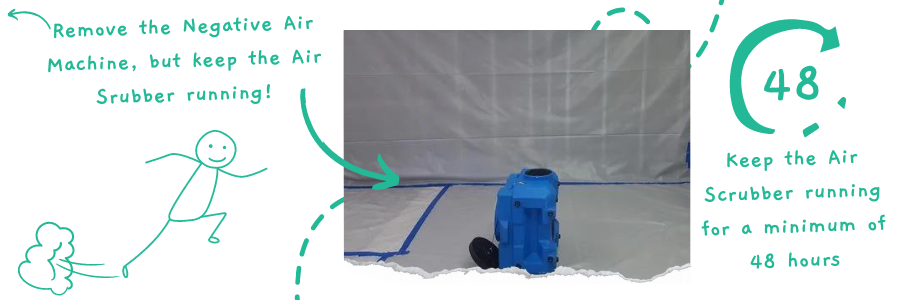
Step 14: Remove the Negative Air and Leave the Air Scrubber in the Containment
Switch off the negative air machine to wrap up the remediation process, but keep the air scrubber running. The air scrubber should continue operating for at least 48 hours to filter out all remaining airborne contaminants.
Step 15: Schedule the PRV Testing
Once you’re confident the area is clean, schedule Post-Remediation Verification (PRV) testing. You will need to hire certified professionals to perform this testing to ensure that the mold remediation has been successful and that the air quality is safe for the home's occupants.
Step 16: Receive PRV Clearance and Remove Containment
Following successful PRV testing, you can finally dismantle the containment setup. Documenting the area's state for reference in future restoration or repair work is a good practice. This documentation can also be helpful for insurance purposes or potential future claims.
Mold Your Future with KnowHow (In a Good Way!)
Mastering these steps is more than just following instructions—it’s about integrating this knowledge into your daily operations to ensure consistency and high-quality outcomes. Given the complexity and potential dangers of mold, the complete process is too extensive to cover here. For the full, detailed mold remediation process, visit KnowHow’s full template here.
But these templates are only the icing on the cake of what KnowHow has to offer. Quickly becoming one of the industry’s favorite tools for employee onboarding, training, and real-time guidance for employees in the field, KnowHow ensures every team member understands your processes, follows best practices, and works confidently in the field.
Elevate your approach and empower your workforce today. Learn more about KnowHow at tryknowhow.com.
Looking for a reprint of this article?
From high-res PDFs to custom plaques, order your copy today!


